When you have a child who goes through reams of paper drawing structures like buildings, maps, villages, and cities and also has a strong desire to be an architect when he grows up. Yes, I mean ream after ream after ream of paper is used in our home to draw these things. Then the idea of being able to create actual 3 dimensional items by drawing them with a 3d pen is cool. But, who can afford a 3d printer?

I received the AtmosFlare 3d Drawing Pen Kit for free in exchange for this review,
I am receiving paid compensation for my time, all opinions expressed are my own
and I am not required to write a positive revew.
This post may contain affiliate links to products and services.
When I first learned of the AtmosFlare 3D pen and realized it was the both affordable and safe I was thrilled to offer my son an opportunity to try it out. It’s such a cool idea to be able draw in 3 dimensions. Isn’t it? This is the kind of futuristic stuff we all heard about as kids, but moms, the future is now.
Your kids get to grow up in the technology age. They get to be hands-on with cutting edge technologies that we all hoped would come to fruition in our lifetimes.
Using the 3d Pen from AtmosFlare
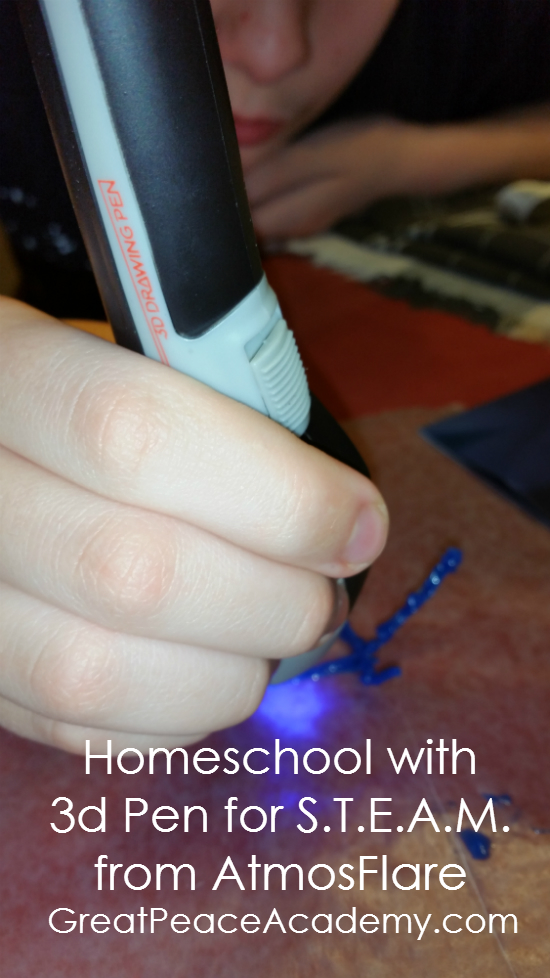
To use this 3d pen you will want to have a flat, dry surface. AtmosFlare includes a series of videos on their Quick Start page with great tips on how to use the pen most effectively.
We used wax paper as our drawing surface, but I think there would be better options, such as a plastic binder divider, which I couldn’t find because of our recent move. It’s also recommended that a dark surface rather than a light surface such as white paper is better to help with the curing process.
- There is a learning curve.
While the usage is simply intuitive there is a learning curve to how to use the pen. Taking the time to practice drawing lines up and across is important, remember learning to write on paper took time, so too does learning to write in air. As with any art form practice is required as part of the learning process. - Start with a base line and work up then across.
It’s obvious but maybe needs saying that a foundation is key when building in 3 dimensions. Also, if you are building something like a cube I suggest doing your base then your vertical lines, then go fromvertical tip to vertical tip for your horizontal lines. - Go slow, but not too slow.
If you draw fast the ink will be thin, not stable and not have time to cure properly. If you go too slow, the ink will cure and the tip of the pen will get clogged. (You can just wipe it off). - Keep a Steady Hand
This may be hard to explain to a younger child but I found if I steadied my arm against the side of the table, I could draw with a steadier stream. The steadier you can keep your arm/hand during the drawing process the straighter your lines become. - Keep handy wipes or damp papertowels nearby.
Your hands can get sticky with the liquid from the ink. Especially if you hold the item with one hand while continuing to build with the other. Just keep some wipes on hand and dab off your fingers from time to time. - Buy Extra Ink
You may want to go ahead and order extra ink when your order your AtmosFlare 3d Drawing Pen. The kit comes with 2 ink cartridges, but with practice, the child can go through that quickly. Plus there are other colors available which makes the overall artistic or engineering opportunities all the more fun.
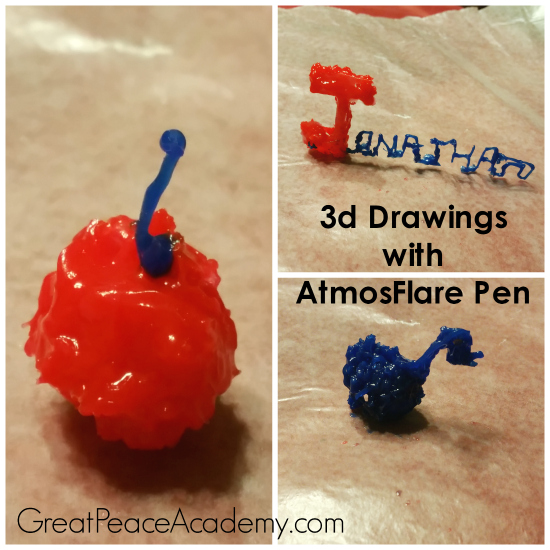
The cool thing is, if you make a mistake, you can simply pinch off the mistaken portion and try again. We also discovered that sometimes those pinched off pieces are the perfect shape for another project or as filler, simply hold the tip of it near where you want to place it, add a drop of ink from the pen and cure. That’s how I added the stem to this cherry, by using a discarded part from a different project.
The Advantages of the 3d Pen from AtmosFlare
Rather than using filament or plastic melted at very high temperatures (up to 450° F) like other 3d pens do, this 3d pen uses a propriertary special ink that allows the user to draw both vertically and horizontally to create a 3 dimensional work of art or engineering. The low temp UV light which surrounds the tip of the pen cures the ink while the drawing takes place.
The AtmosFlare 3d Drawing Pen is affordable. At only $29.99 this is a S.T.E.A.M. product that is easy to fit into the family homeschooling budget. Especially, if you have a child fascinated with art, technology or engineering.
When you purchase the AtmosFlare 3d Drawing Pen you will receive a kit.
The Kit Contains
- The 3d Pen
- 1 Red Ink Refill Cartridge
- 1 Blue Ink Refill Cartridge
- 1 AA Battery (Yep, they even include the battery!)
You can also purchase AtmosFlare 3d Drawing Pen from your local Toys R Us or Best Buy and I hear that they will soon be available at Wal-Mart.
AtmosFlare 3d Pen Giveaway
Woot! Who doesn’t love a giveaway? AtmosFlare is giving away 30 3d drawing pens and you could be one of the recipients. Simply enter your information in the widget below. If you win, you will be contacted by an AtmosFlare representative to complete your fulfillment.
Connect with AtmosFlare
For fun project ideas, extra tips or to show off your kids own creations connect with AtmosFlare on Social Media by liking on Facebook, following on Twitter, Instagram, or Pinterest.
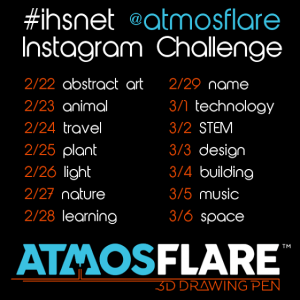
Participate in this Instagram Challenge
For another amazing chance to win an AtmosFlare 3d Drawing Pen simply participate in this Instagram Challenge, follow the daily prompts with your own interpretation of the daily challenge word, and tag @atmosflare and use #ihsnet.
But even if your child isn’t quite as into art and engineering as mine is, there are many applications for the use of this product. In fact, you can even use this product to teach math, like my friend Karyn at Teach Beside Me did. One friend has a daughter is into geeky things like Doctor Who, with UV lights and drawing in 3 dimensions, of course a Tardis creation was in order.
I’d love to hear what application you think would be best for your homeschooling students? Please give me your thoughts and ideas in the comments below.

You May Also Enjoy